

How to Mix Epoxy Resin for Beginners: A Comprehensive Step-by-Step Guide
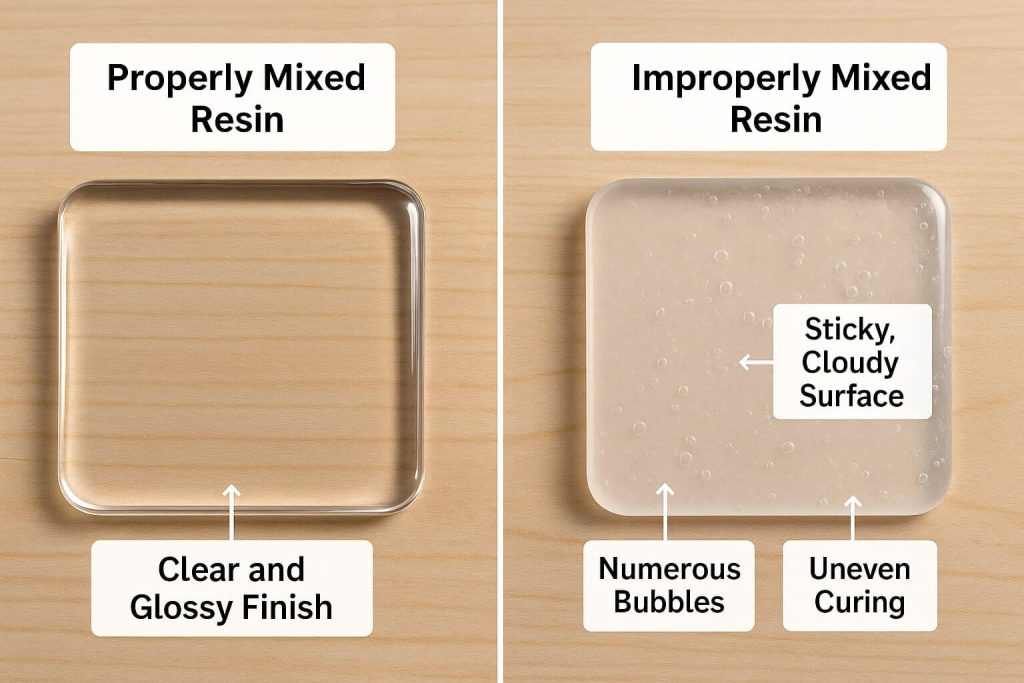
Have you ever admired resin art’s glossy, glass-like finish and wondered how to create your own? Epoxy resin’s versatility opens a world of creative possibilities, from stunning jewelry pieces to mesmerizing river tables. But here’s the truth: perfectly mixing epoxy resin is the foundation for successful resin art. Even the most beautiful design can end up sticky, cloudy, or worse—never cure without proper mixing.
Epoxy resin is a two-part system consisting of Part A (resin) and Part B (hardener) that cures through a chemical reaction called polymerization. When these components combine, they create a strong, durable plastic through an intricate molecular dance. The catch? Improper mixing is the #1 problem beginners face, leading to frustrating issues like sticky surfaces, soft spots, or resin that won’t cure.
This comprehensive guide will walk you through every aspect of mastering epoxy resin mixing for beginners. We’ll cover essential materials, critical safety measures, precise measuring techniques, proper mixing methods, timing considerations, and solutions to common problems. While precision is key to success with epoxy resin, don’t worry – the process is learnable with the proper guidance.
I. Understanding Your Epoxy Resin and Essential Tools
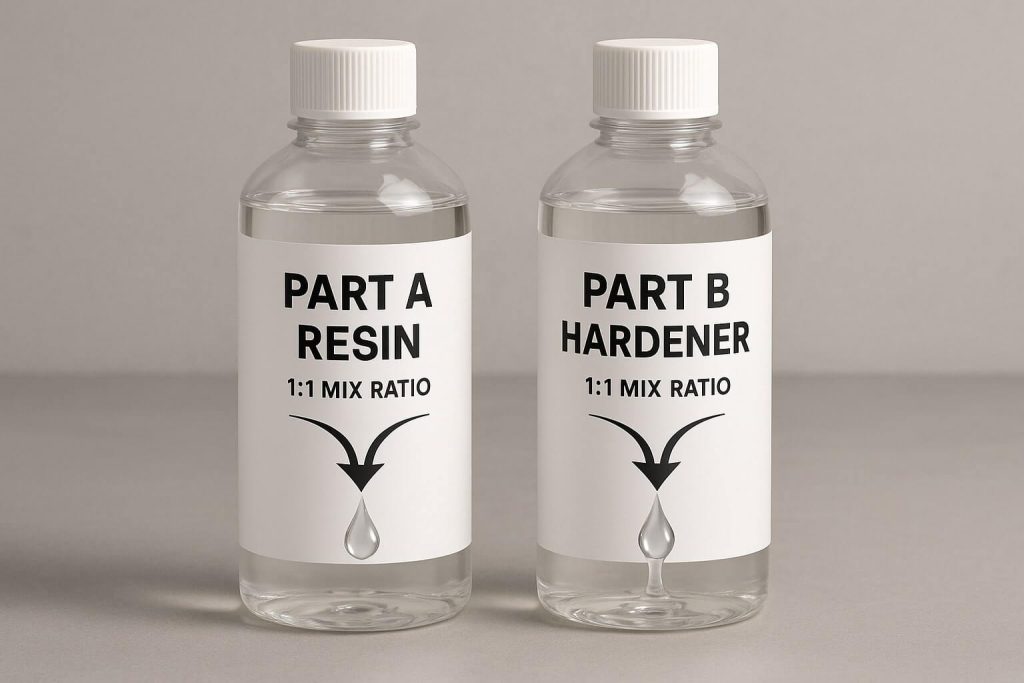
A. Decoding Epoxy Resin: Part A (Resin) and Part B (Hardener) Explained
Part A (Resin) is the base prepolymer – think of it as the foundation of your project. Part B (Hardener or Curing Agent) is the chemical reaction catalyst. When these two components meet and mix, they form a strong, cross-linked polymer network through the curing process (polymerization). This reaction is exothermic, generating heat as the molecules bond together.
B. Choosing the Right Resin for Your First Mix: Simplicity is Key
For beginners, I strongly recommend starting with an epoxy resin that has a 1:1 mix ratio by volume. This simplifies measurement and reduces the chance of errors. You’ll encounter two main types:
- Casting Resins: Thinner consistency, ideal for molds and deeper pours, with better bubble release
- Coating/Doming Resins: Thicker consistency, perfect for surfaces and thinner layers, self-leveling properties
A general-purpose “art resin” makes an excellent starting point. Look for features like UV resistance to prevent yellowing and low odor/VOC-free formulations for a more pleasant working experience. Remember that opened resin has a limited shelf life – plan to use it within 30 days to a year for best results.
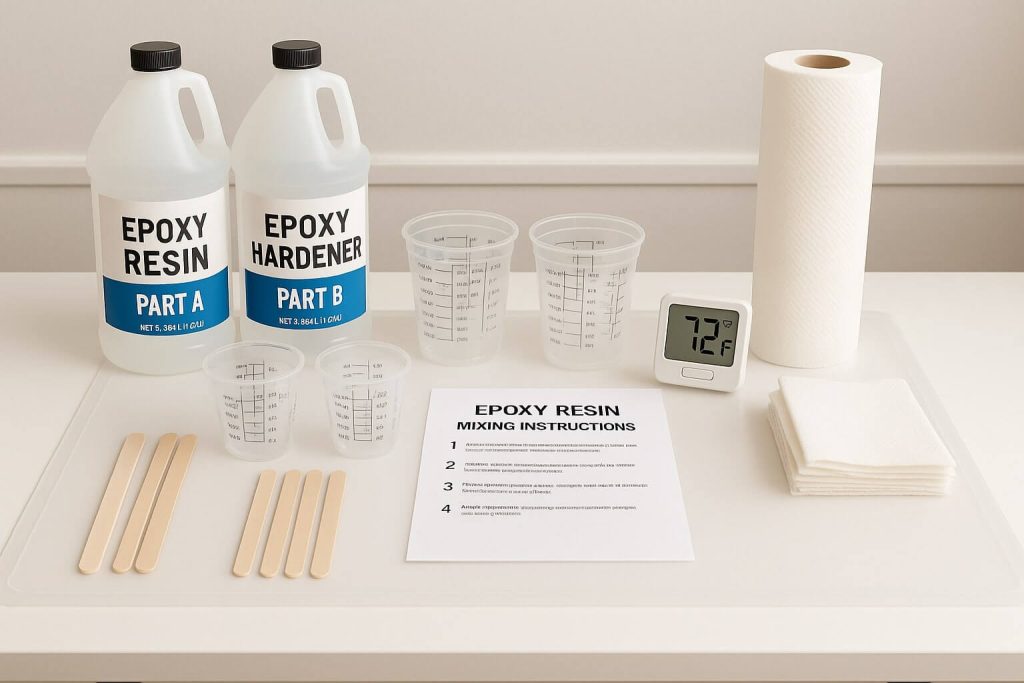
C. Your Mixing Toolkit: Essential Supplies Checklist
Here’s everything you’ll need for successful resin mixing:
- Epoxy Resin & Hardener (Part A & Part B)
- Measuring Cups: Clear cups with accurate, visible, wear-resistant graduated markings (ml or oz). Use separate, identical cups for Part A and Part B. Choose PP (polypropylene #5) or HDPE (#2) plastic or reusable silicone cups. AVOID polystyrene (PS #6)
- Mixing Cups/Containers: Larger than measuring cups (fill no more than 3/4). Same material recommendations
- Stir Sticks: Plastic, reusable silicone, or wooden craft sticks. Flat-edged or blade-shaped stir sticks are superior for thoroughly scraping sides and bottom.
- Safety Gear: Nitrile Gloves, Respirator (Organic Vapor), Safety Glasses/Goggles, Protective Clothing
- Workspace Protection: Plastic Drop Cloth/Sheeting or Silicone Mat
- Level (Spirit Level): To ensure a perfectly flat work surface
- Heat Gun or Propane Torch: For removing bubbles after pouring (use caution with alcohol inks)
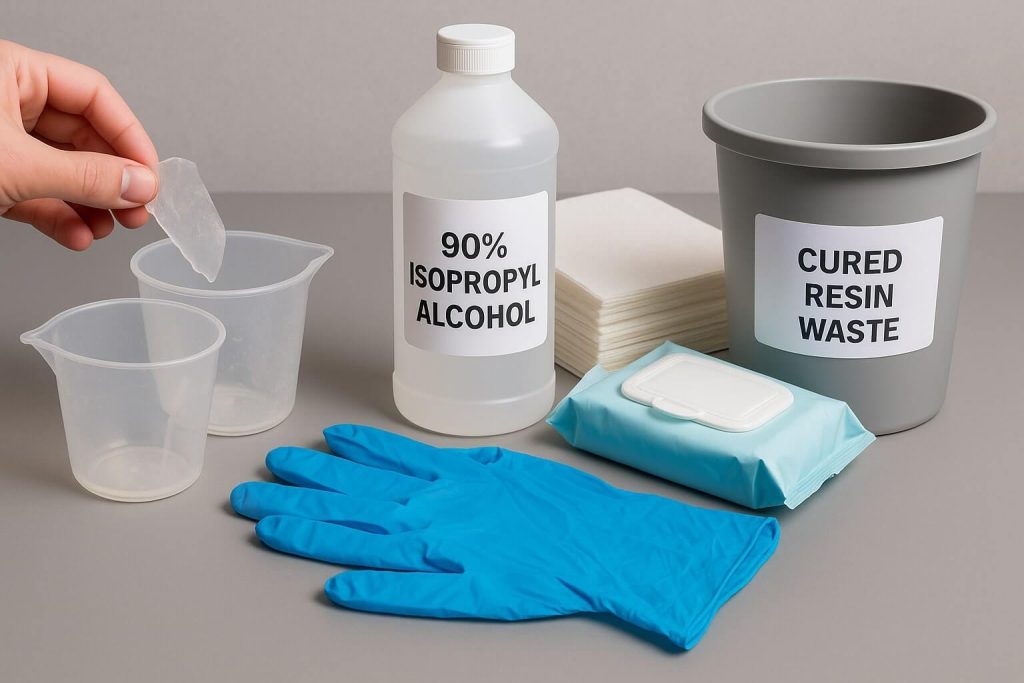
- Paper Towels & Isopropyl Alcohol (or specialized resin cleaners): For spills and tool cleaning
- Timer: For timing mixing and pot life
- (Optional) Colorants: Mica powders, alcohol inks, etc. (added after clear resin/hardener are mixed)
- (Optional) Dust Cover: Clean cardboard box or curing cover
II. Safety First! Protecting Yourself and Your Workspace
A. The Non-Negotiables: Why Epoxy Resin Demands Respect
Working with liquid epoxy resin poses several potential risks: skin irritation and allergic contact dermatitis, sensitization (developing an allergic reaction over time with repeated exposure), respiratory issues from vapors, and eye damage from splashes. Don’t be fooled by “non-toxic” labels – these usually refer to fully cured resin. The liquid components require careful handling.

B. Your Armor: Essential Personal Protective Equipment (PPE) in Detail
- Nitrile Gloves: Nitrile is preferred over latex due to its superior chemical resistance and because latex can degrade when exposed to resin. Wear them throughout the entire process.
- Respirator: A dual-cartridge respirator with organic vapor cartridges is strongly recommended. Standard dust masks (N95) are NOT sufficient. This protection is critical with limited ventilation or prolonged exposure.
- Safety Glasses/Goggles: Essential protection against splashes
- Protective Clothing: Long sleeves, apron, or disposable coveralls
C. Creating Your Safe Haven: Setting Up an Effective Workspace
Ventilation is Vital: Ensure good airflow with open windows and fans directing air away from you and outdoors. Local exhaust ventilation is beneficial for regular indoor work.
Surface Protection: Cover your table and floor with plastic sheeting or silicone mats to catch any drips or spills.
Ideal Temperature: Maintain consistent room temperature (typically 70-75°F / 21-24°C, but always check manufacturer recommendations).
Level Surface: Use a spirit level to ensure your work surface is perfectly flat.
Clean & Organized: Keep your workspace dust-free and ensure food, drinks, children, and pets stay away from your resin area.
D. Oops! Emergency Preparedness: Handling Skin Contact and Spills
Skin Contact: Wash immediately with soap and warm water. An exfoliant cleanser or orange hand cleaner can help remove stubborn resin. CRITICAL WARNING: NEVER use solvents (alcohol, vinegar, acetone) on the skin—these can drive the resin deeper into the skin.
Eye Contact: Flush with clean water for 15 minutes and seek immediate medical attention.
Spills: Clean liquid spills promptly. Scrap up the excess, wipe with paper towels, then use isopropyl alcohol or acetone for tools and surfaces (never on the skin).
III. Pre-Mixing Preparations: Setting Up for Success
A. The Golden Rule: Read Your Resin’s Instructions!
ALWAYS read and meticulously follow the manufacturer’s specific instructions for YOUR resin kit before starting. Look for:
- Mix Ratio (e.g., 1:1, 2:1)
- Measurement Method (Volume or Weight – these are NOT interchangeable)
- Pot Life/Working Time
- Cure Time
- Recommended Temperature
- Maximum Pour Thickness
Remember: guessing ratios or adding extra hardener will lead to cure problems, not faster results!
B. Temperature Tango: Ideal Conditions for Resin, Room, and Materials
Ideal Ambient (Room) Temperature: Typically 70-75°F (21-24°C) or as per manufacturer specifications. Consistency is key for the first 24 hours of cure.
Impact of Cold: It makes resin thicker and more complex to measure/mix, traps bubbles, and leads to a slow or incomplete cure (soft/tacky finish).
Impact of Hot: It makes resin thinner and easier to mix and helps release bubbles, but it drastically shortens pot life/working time and risks overheating/cracking.
Humidity: Work in low humidity (ideally under 50%, but under 80% is acceptable). High humidity can cause cloudiness, amine blush, or a tacky finish.
C. Warming Your Resin: When and How (Safely!)
If your resin or workspace is cold, warming helps create a thinner resin that’s easier to measure and mix with fewer bubbles.
Safe Warming Method: Warm Water Bath
- Tightly seal Part A & B bottles.
- Place in a container with warm water (NOT hot or boiling) for 10-15 minutes. The water level should reach halfway up the bottles. (Optional: Use Ziploc bags for extra protection)
- Dry bottles thoroughly before opening (water contamination causes cloudiness)
Cautions: Never warm already mixed resin. Remember that warmed resin has a shorter pot life.
D. Arranging Your Mixing Station: Tools at the Ready
Lay out all PPE, clean/dry measuring and mixing cups, stir sticks, resin/hardener (warmed if needed), timer, cleaning supplies, and your prepped mold or surface on a protected, level area.
IV. The Art of Mixing: A Detailed Step-by-Step Guide
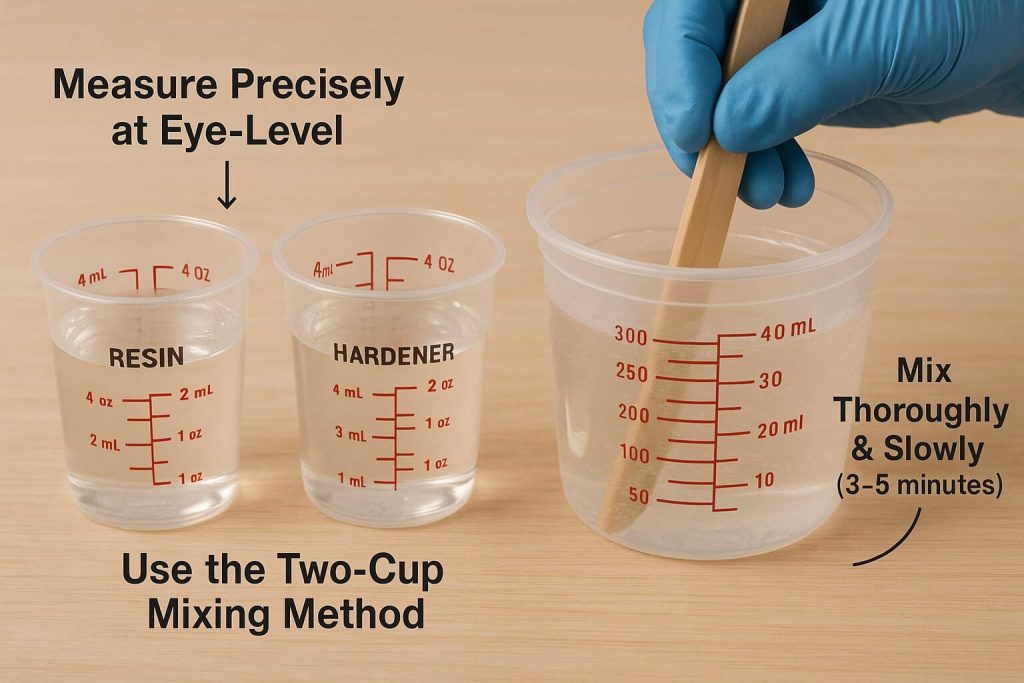
A. Step 1: Measure with Absolute Precision
Accuracy is non-negotiable to avoid sticky, soft, or uncured resin.
Measuring by volume (for 1:1 ratio art resins):
- Place two separate, clean, dry, graduated measuring cups on a level surface. Label if helpful
- Pour Part A into one cup, viewing at eye level, reading the bottom of the meniscus
- Pour Part B into the second cup to the same volume
- Do NOT eyeball. Using separate cups for initial measurement enhances accuracy.
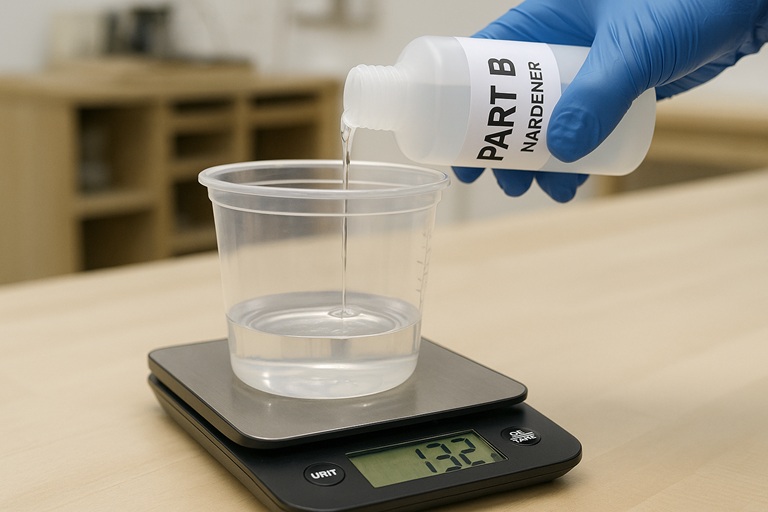
Measuring by weight (if specified by YOUR resin):
- Use an accurate digital scale. Tare empty mixing cup.
- Add Part A to the required weight. Tare again
- Add Part B to the required weight.
- Remember that weight ratios differ from volume ratios due to density. Strictly follow the manufacturer’s method and ratio.
Always double-check your measurements before proceeding.
B. Step 2: Combine the Components
- Pour measured Part B into Part A (or both into a new, larger mixing cup)
- Scrape the Part B measuring cup to transfer all hardeners.
C. Step 3: The Mixing Technique – Stir, Scrape, Repeat! (The Heart of the Process)
Your goal is a completely homogenous mixture. Incomplete mixing is the leading cause of cure failures.
Stirring Motion & Speed: Stir slowly and steadily. Avoid rapid or whipping motions to minimize bubbles.
Scraping is crucial: Continuously and thoroughly scrape the sides and bottom of the mixing container throughout. If transferred, unmixed material clinging to surfaces will cause sticky or uncured spots. Scrape resin off your stir stick and stick it back into the mix periodically.
Mixing Duration: Minimum 3-5 minutes for small/medium batches. Some sources suggest longer (up to 7-10 minutes). ALWAYS follow YOUR resin’s specified mixing time. Use a timer!
Visual Cues: The mixture’s initial cloudy or streaky appearance is normal. Continue mixing and scraping until streaks and cloudiness disappear and the mixture is uniformly clear and consistent.
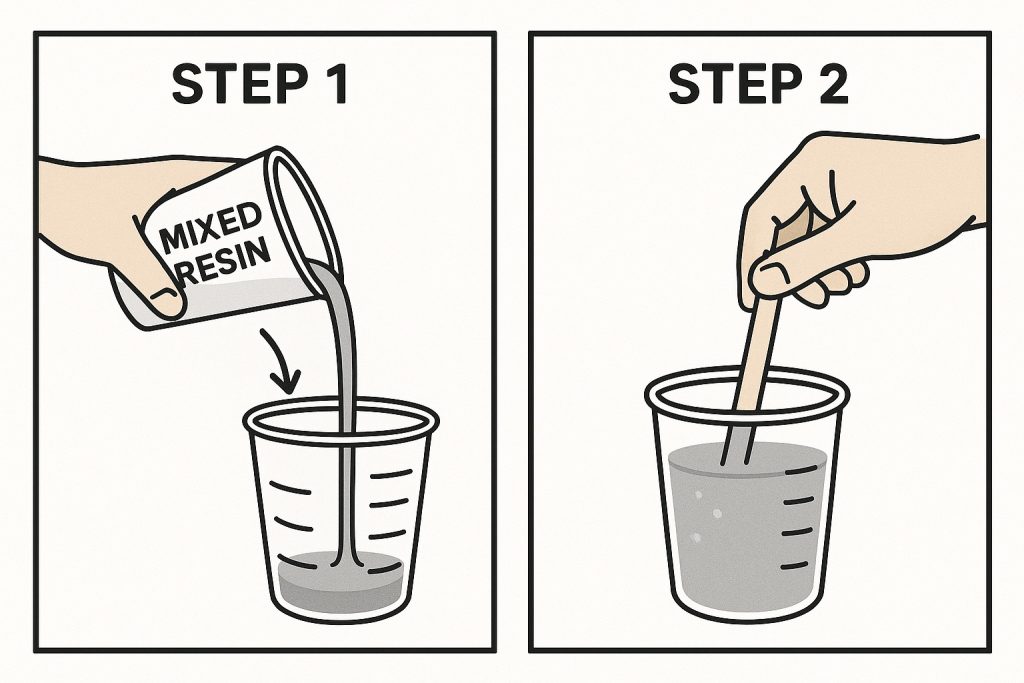
D. Step 4: The Two-Cup Method (Your Secret Weapon for Success)
This technique is highly recommended for beginners to ensure thorough mixing and avoid transferring unmixed material from the first cup’s sides and bottom.
Procedure:
- After the initial mix (e.g., 2-3 minutes with thorough scraping), pour the entire mixture into a second, clean, dry mixing cup.
- Scrape the first cup well, transferring all the resin.
- Using a clean stir stick, mix again in the second cup for another 1-2 minutes (or as per instructions), again scraping the sides and bottom.
E. Step 5: Bubble Management During Mixing
- Stir slowly, smoothly, and steadily. Avoid lifting the stir stick in and out frequently.
- Warming resin components before mixing helps bubbles rise and pop more easily.
- (Optional) Let mixed resin sit briefly (1-5 minutes, mind pot life) for some bubbles to rise. For beginners, it’s safer to rely on post-pour bubble removal.
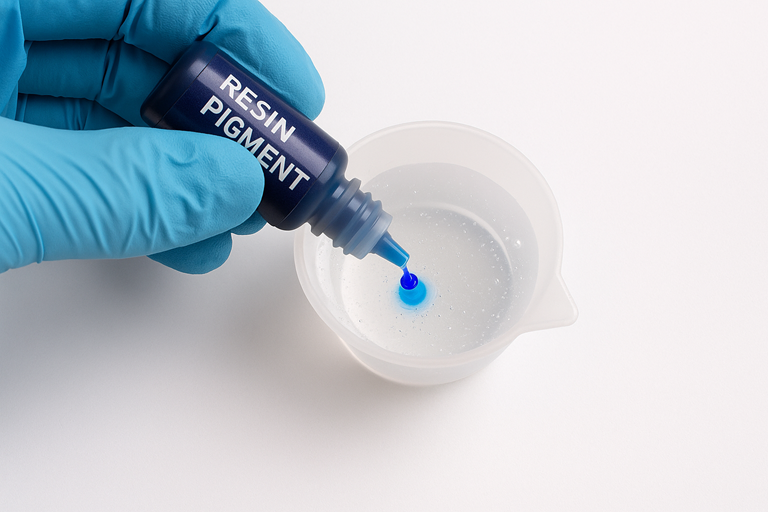
F. (Optional) Step 6: Incorporating Colorants or Inclusions
- Add colorants after Parts A & B are thoroughly mixed and clear.
- Add colorants sparingly (no more than 5-6% by volume; some say up to 10% – check recommendations). Too much can inhibit the cure.
- Mix colorant in gently but thoroughly until evenly dispersed.
- Divide mixed clear resin into smaller cups for multiple colors, then add individual colors.
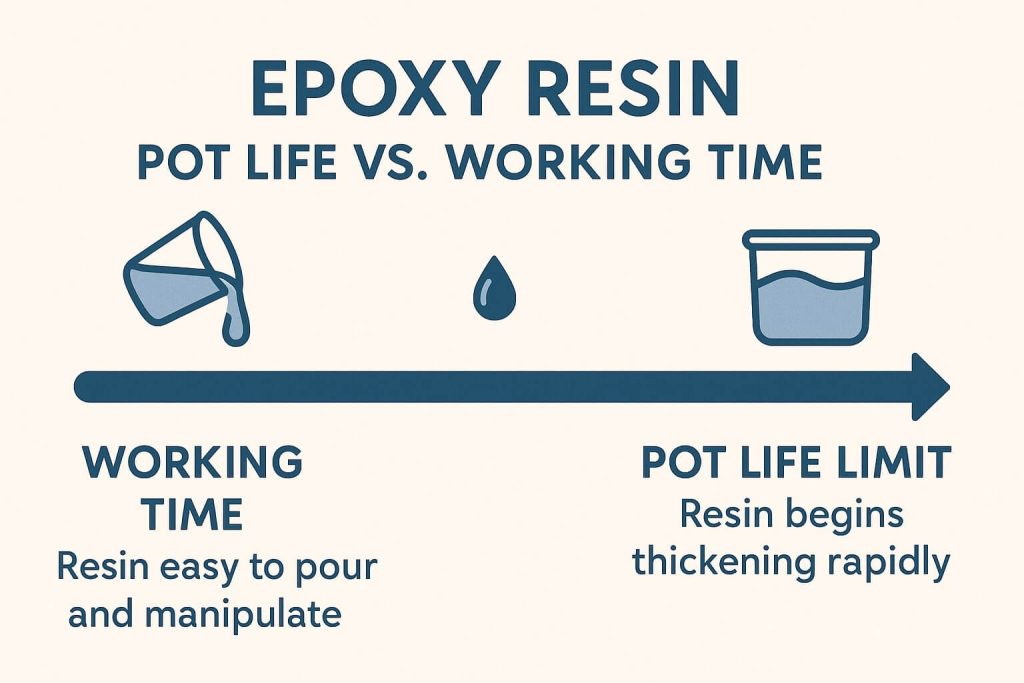
V. Understanding Timings: Pot Life vs. Working Time
A. Defining Pot Life and Working Time for Beginners
Pot Life is when a specific mass of mixed epoxy remains liquid in the mixing container (“pot”). It is usually shorter due to trapped exothermic heat accelerating the cure.
Working Time (Open Time): The mixed resin, after being poured/spread thinner, remains fluid enough to apply, manipulate, and remove bubbles.
Cure Time: The total time for resin to transition from liquid to gel to solid and then to full hardness. Initial cure (handleable) vs. Full cure (maximum hardness). For example, 24 hours initial and 72+ hours full for art resins.
Remember: resin cures faster in a mass in the cup than when spread out!
B. How Factors Like Batch Size, Temperature, and Resin Type Affect These Times
Batch Size (Volume in Pot): Larger volumes generate more exothermic heat, shortening pot life. Mix only what you can use, or mix multiple small batches.
Temperature (Ambient, Resin, Surface): Warmer temperatures accelerate cure (shorter pot/working time). Cooler temperatures slow cure (longer pot/working time, but risk improper cure if too cold). Rule of thumb: A 10°C (18°F) increase can halve cure time.
Type of Resin/Hardener: Different systems have different cure speeds (fast, medium, slow). Check product specifications.
Humidity: High humidity can sometimes slow cure and affect surface finish. Work in moderate humidity.
VI. Troubleshooting Common Mixing Mishaps
| Problem | Likely Cause(s) from Mixing Error | How to Avoid/Fix (Mixing-Related Solutions) |
| Sticky, Tacky, or Bendy Resin (doesn’t fully harden) | 1. Incorrect Mix Ratio (most common) 2. Under-Mixing 3. Excessive Colorant 4. Moisture Contamination (from tools/environment during mix) 5. Cold Temperature during mixing/curing 6. Measuring Error (volume vs. weight confusion) | Avoid: Measure PRECISELY. Mix THOROUGHLY (3-5+ mins, scrape, two-cup method). Limit colorant (5-10%). Ensure dry tools/environment. Work in recommended temp. Fix: Minor tackiness: warm spot for days. Severe: scrape off, clean, repour correctly. |
| Cloudy Resin or Streaks in Cured Piece | 1. Under-Mixing (visible streaks/cloudiness) 2. Moisture Contamination during mix 3. Resin/Room Too Cold during mix 4. Whipping Air into Mix | Avoid: Mix until NO streaks/cloudiness. Ensure dry tools/low humidity. Warm resin/room. Stir slowly. Fix: Usually permanent if cured. Sand & recoat. Surface amine blush (from humidity) might be cleanable with alcohol then recoat. |
| Excessive Bubbles in Cured Piece (beyond easy heat gun removal) | 1. Mixing Too Vigorously/Whipping 2. Cold Resin/Room (traps air) 3. Pouring Too Quickly/High | Avoid: Stir slowly/smoothly. Warm resin/room. Pour slowly/close to surface. Let mixed resin sit briefly (mind pot life). Use heat gun/torch correctly after pouring. Fix: Mostly permanent. Prevention is key. |
| Resin Cures Too Fast (in mixing pot) / Flash Cure | 1. Large Batch Size (excessive exothermic heat) 2. High Ambient/Resin Temperature 3. Using a Fast-Setting Resin Type | Avoid: Mix smaller batches. Work in recommended temp. Understand resin’s pot life. Pour from cup ASAP. Fix: Unusable. Handle hot pot with care. Dispose of safely once cooled. Prevention only. |
| Resin Doesn’t Cure At All (Remains Liquid/Very Gooey) | 1. Drastically Wrong Mix Ratio (e.g., forgot hardener, mixed two Part As) 2. Wrong Components Mixed (from different, incompatible resin systems) | Avoid: Double/triple check adding Part A & B. Label bottles. Measure meticulously. Keep systems separate. Fix: Scrape off completely. Clean surface thoroughly with solvent. Dry. Repour correctly. |
VII. Post-Mixing: Clean-Up and Storage
A. Cleaning Tools and Containers
While Resin is Wet (Easiest):
- Mixing Cups/Stir Sticks (Silicone/Reusable): Wipe excess with paper towels. Use isopropyl alcohol (90%+) or acetone to clean residue. Baby wipes work well for silicone.
- Disposable Cups/Sticks: Can let cure and discard, or peel cured resin from some plastics
The silicone can be peeled or popped off if the resin has cured on the tools. Hard plastic or metal can be scraped or sanded (this isn’t easy).
B. Dealing with Spills on Surfaces
Wipe liquid spills immediately. For residue on protected surfaces, use alcohol or acetone (test solvent first). Cured spills are hard to remove.
C. Safe Disposal of Unused Resin and Waste
Never pour liquid resin down the drain or into the environment. Small amounts of leftover mixed resin can be cured fully in a cup and disposed of as solid waste (check local regulations). For unmixed components, check local hazardous waste guidelines. Contaminated paper towels/gloves can usually go in regular trash once the resin is cured (check local regulations).
D. Storing Leftover Resin Components
- Clean bottle rims/threads. Recap tightly with correct lids (don’t switch)
- Store in original containers in a cool, dark, dry place, away from sunlight/extreme temps, out of reach of children/pets
- Shelf life: unopened ~1 year+, opened use within months to a year
Conclusion
Mastering epoxy resin mixing comes down to understanding your materials, meticulous preparation, unwavering safety practices, and precise measuring and mixing techniques. Most common beginner issues – sticky resin, excessive bubbles, or cure problems – stem from mixing entirely preventable errors.
Remember these key principles: always follow your manufacturer’s instructions for mix ratio and method, embrace the two-cup mixing technique, and never underestimate the importance of thoroughly scraping your mixing container. With patience and practice, you’ll soon be confidently creating beautiful resin pieces.
Don’t be discouraged if your first attempts aren’t perfect. Every expert was once a beginner, and each project teaches valuable lessons. Keep practicing, stay safe, and enjoy the creative journey!
FAQ Section (Frequently Asked Questions for Beginners about Mixing Resin)
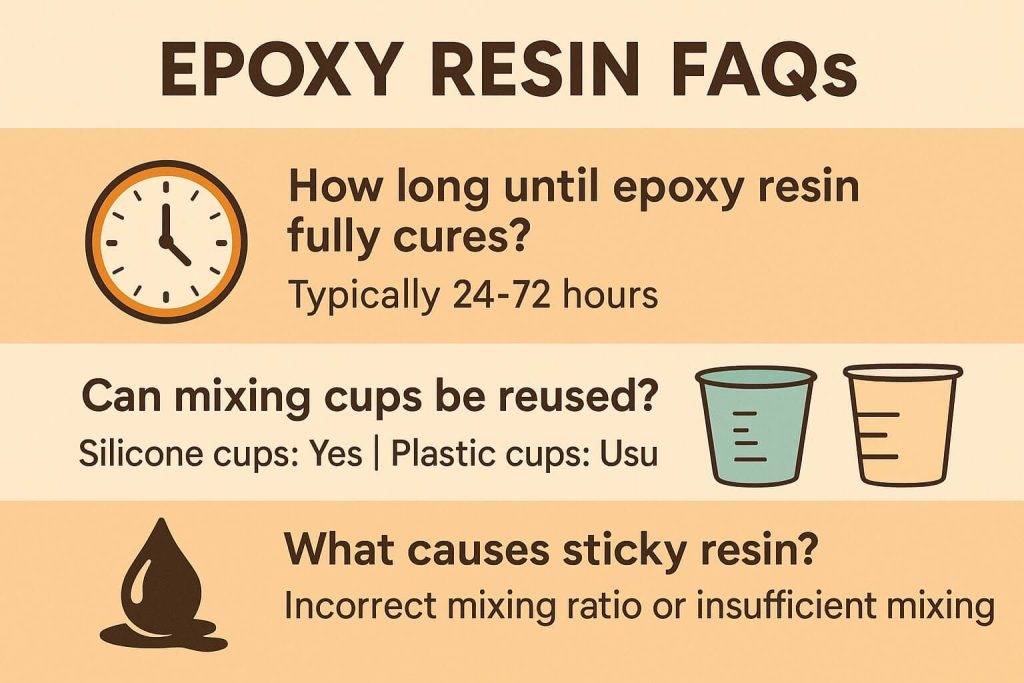
Q1: Why is my resin still sticky/tacky after the recommended cure time? A: Incorrect mix ratio or insufficient/improper mixing are the most common culprits. Cold temperatures, excess colorant, or moisture contamination are also possible. Refer to the troubleshooting section for specific solutions.
Q2: How do I get rid of bubbles in my mixed resin? A: Minimize bubbles during mixing by stirring slowly and warming your resin. After pouring, use a heat gun or torch. Let mixed resin sit briefly before pouring (but mind the pot life).
Q3: Can I use any plastic cup to mix resin? A: No. Use PP (#5), HDPE (#2) plastic, or silicone. Avoid PS (#6). Always use clean, dry, graduated cups for accurate measurement.
Q4: What’s the difference between “pot life” and “working time”? A: Pot life = time resin stays liquid in the mixing cup (shorter due to heat buildup). Working time = time to apply and manipulate after pouring/spreading.
Q5: My resin cured too fast in the cup! What happened? A: This is called a flash cure. It’s caused by mixing too large a batch, using high-temperature resin, or using fast-setting resin left in the cup too long.
Q6: Do I need to wear a respirator if my resin says “low odor?” A: Yes, an organic vapor respirator is highly recommended. “Low odor” doesn’t mean no harmful vapors, especially with cumulative exposure or poor ventilation.
Q7: How critical is scraping the sides and bottom of the mixing cup? A: Extremely critical! Unmixed material clings to these areas and will cause sticky or uncured spots if not properly incorporated.
Q8: Can I add more hardeners to speed up the resin’s cure? A: No, absolutely not. Adding more hardeners will disrupt the chemical balance and result in a poor cure (sticky/soft finish). Always stick to the specified ratio.
Other Articles

