
")
Picture this: you’ve just created your first stunning resin coaster, glittering with embedded flowers and swirls of color. You’re feeling proud and accomplished… until you look at your workspace. Sticky cups, gooey stir sticks, and resin drips everywhere! Don’t worry – we’ve all been there, and I’m here to tell you that resin cleanup doesn’t have to be the dreaded aftermath of your creative joy.
If you’re new to resin art and feel overwhelmed by the sticky situation, take a deep breath. This guide is your friendly companion to mastering how to clean resin tools simply, safely, and stress-freely. Please think of me as your crafty friend who’s already made all the mistakes, so you don’t have to!
Cleaning resin supplies properly is like learning any new skill – once you know the tricks, it becomes second nature. With the proper knowledge and habits, you’ll be able to extend the life of your tools, save money, and, most importantly, spend more time creating and less time stressing about cleanup.
A Note on Epoxy vs. UV Resin Tool Cleaning: Throughout this guide, while many cleaning principles apply to tools used for epoxy and UV resin, I’ll highlight any essential differences you should know. For instance, uncured UV resin on your tools will stay liquid until it sees UV light (so you can wipe it off or store tools in darkness), while mixed epoxy has a ticking clock and will start curing on its own regardless of light. These little differences can make a significant impact on your cleaning strategy!
Why Bother? The Big Wins of Proper Resin Tool Care
Let’s talk about why taking a few extra minutes for resin tool care is worth your time:
Tool Longevity: Your silicone molds, mixing cups, and spreaders aren’t cheap! Proper cleaning can make them last for dozens or even hundreds of projects instead of just a few.
Pristine Projects: Nothing ruins the excitement of a new project faster than finding a rogue piece of glitter or a chunk of old cured resin contaminating your fresh pour. Clean tools mean pure, beautiful results every time.
Safety First: Minimizing skin contact with uncured resin and reducing exposure to fumes during cleanup isn’t just smart – it’s essential for your health.
A Happier Crafting Space: A clean, organized workspace is much more inspiring than a sticky, chaotic one. You’ll look forward to crafting when your space is inviting!
Cost-Effectiveness: Why spend money on disposable tools when you can reuse quality ones? Your wallet will thank you.
Avoid Common Frustrations: Many beginners struggle with tools that become permanently sticky or ruined after just a few uses. Others deal with contaminated projects from poorly cleaned supplies. This guide helps you sidestep these headaches completely!
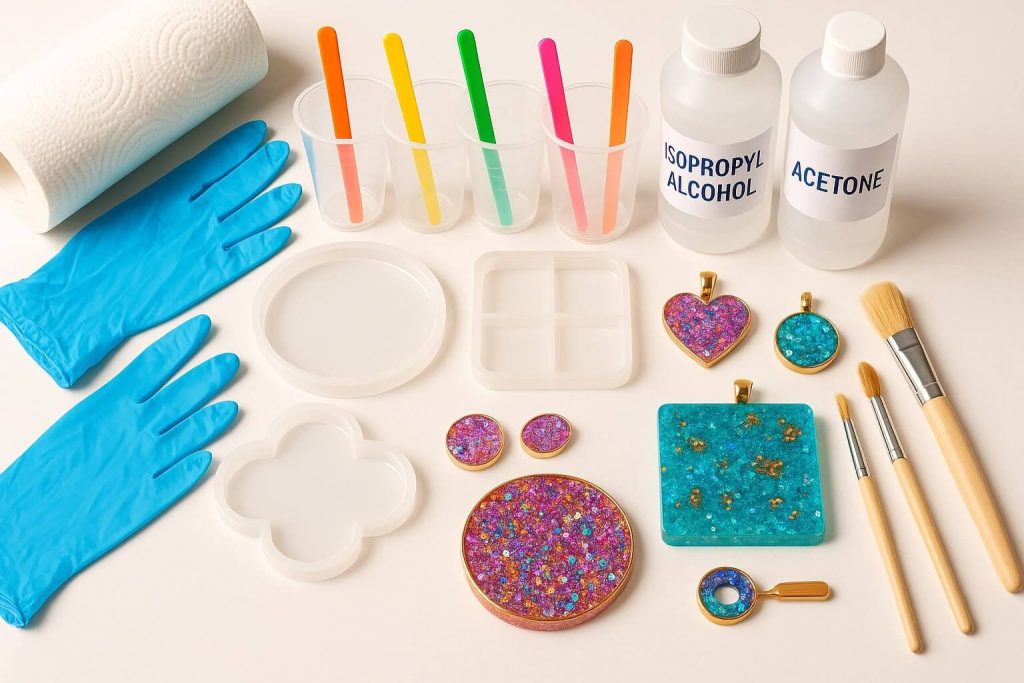
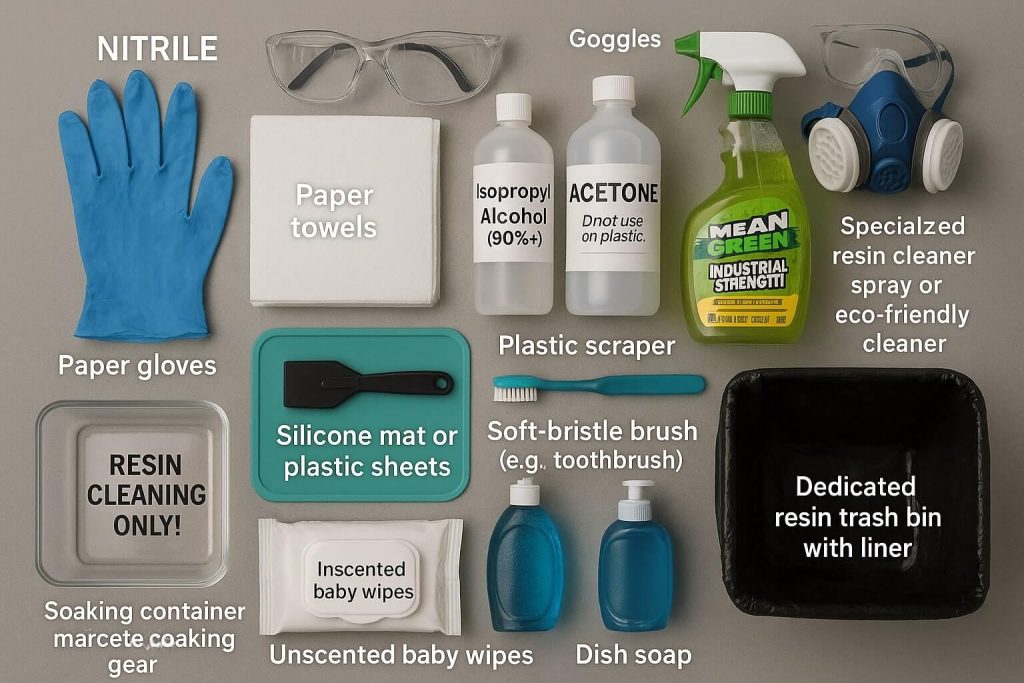
Your Essential Resin Cleaning Toolkit: Be Prepared!
Think of this as your cleanup arsenal – having these items ready before you start crafting will make the process smooth and efficient:
- Nitrile Gloves are your absolute #1 essential! Nitrile is superior to latex or vinyl because it’s more resistant to the chemicals in resin and less likely to cause allergic reactions. Never work without them!
- Paper Towels: You’ll need plenty! Stock up on quality ones that won’t fall apart when wet. These are your first line of defense against wet resin.
- Isopropyl Alcohol (IPA): 90% or higher is best. This alcohol is your primary go-to solvent for removing uncured resin from tools. It dissolves liquid resin beautifully without damaging most surfaces.
- Acetone: Use this solvent to remove stubborn cured resin, but use it with extreme caution and excellent ventilation. This powerful solvent can damage some plastics, so always test first!
- Specialized Resin Cleaners (including Eco-Friendly Options): These commercial products (like resin remover sprays or citrus-based cleaners) can be gentler alternatives to harsh solvents. Some crafters swear by Mean Green or Simple Green. Always check compatibility with your specific resin and tools!
- Denatured Alcohol (DNA): Another solvent option similar to IPA, sometimes preferred for cleaning epoxy brushes. It works similarly but may be more effective on specific resin formulations.
- Baby Wipes (Unscented) is perfect for quick cleanups of uncured resin from tools or gloved hands. Please make sure they’re lint-free for the best results.
- Silicone Mats or Plastic Sheets protect your work surface and make cleanup easy. Once cured, the resin peels right off the silicone!
- Plastic Scrapers: Flexible and firm varieties help remove resin without scratching your precious tools.
- Soft Bristle Brushes: Old toothbrushes or dedicated craft brushes are perfect for scrubbing those hard-to-reach spots.
- Dedicated Soaking Container: Use glass or solvent-resistant plastic (like polypropylene-PP or high-density polyethylene-HDPE). Label it clearly “Resin Cleaning Only”!
- Good Quality Dish Soap and warm water are used for the final wash on many tools, removing any solvent residue.
- Trash Bags/Bin: Essential for proper resin waste disposal – we’ll cover this in detail!
- (Optional but Recommended) Respirator with Organic Vapor Cartridges: This is especially important if you use acetone or work in a space with limited ventilation. Your lungs will thank you!
- Specialized Resin Brush Cleaner (Optional): Some brands provide products to clean and condition brushes between uses.
Cleaning Uncured Resin: The ‘Act Fast & Wipe It Wet!’ Method
Here’s the golden secret to easy uncured resin cleaning: tackle it while it’s still liquid! This is where you’ll save yourself the most time and frustration.
The Golden Rule: Clean It WHILE IT’S WET!
I cannot emphasize this enough – cleaning wet resin takes seconds while removing cured resin can take hours (or be impossible). Make this your mantra!
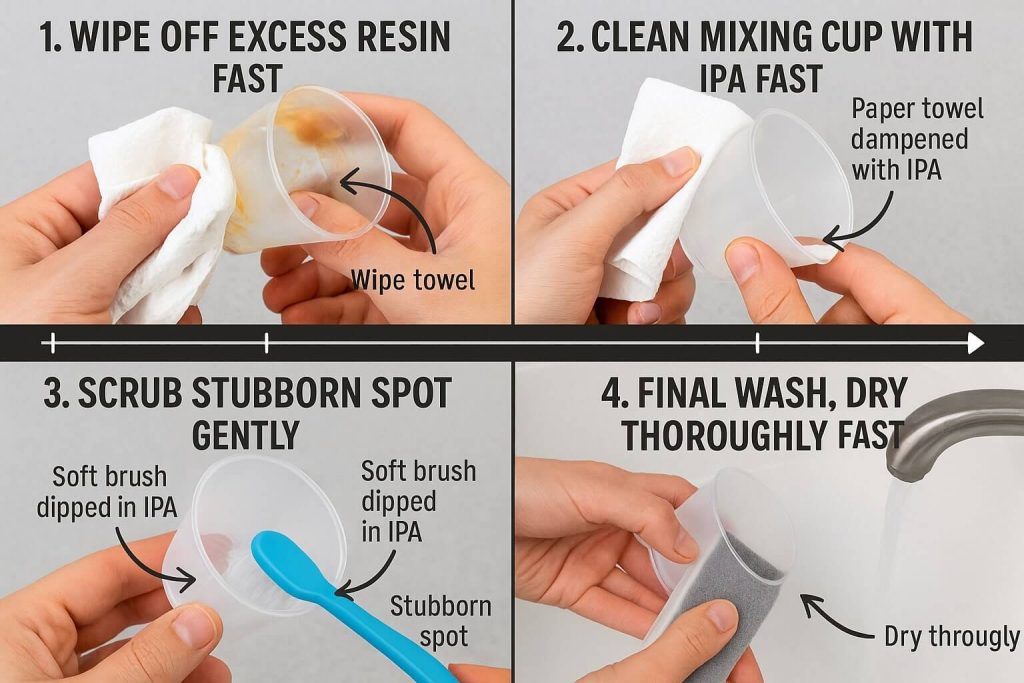
General Steps for Most Tools (Mixing Cups, Stir Sticks, Spreaders)
Step 1: Wipe Out Excess Resin: Grab those paper towels and remove as much liquid resin as possible. Use a scraping motion with your stir stick to get every drop you can.
Step 2: The IPA Wipe-Down: Dampen a fresh paper towel with isopropyl alcohol resin cleaner and thoroughly wipe all surfaces. You’ll see the remaining resin dissolve instantly! Keep using clean sections of the towel until no residue remains. For mixing cups: Pay special attention to the corners and measurement lines – any residue here will throw off your ratios next time!
Step 3: Stubborn Bits? If you encounter any persistent sticky spots, dip a soft brush in IPA and gently scrub them. The combination of mechanical action and solvent works wonders.
Step 4: Optional Soap & Water Wash: For non-disposable tools like quality plastic or metal items, once all resin and IPA are removed, wash them with warm, soapy water. Necessary: Make sure all solvent is gone before this step!
Step 5: Dry Thoroughly: Let tools air dry completely or pat dry with a clean paper towel. Moisture can interfere with your next resin project.
Cleaning Uncured Resin from Silicone Molds & Mats
Silicone mold cleaning requires a gentle touch:
- First, wipe out excess resin with paper towels or unscented baby wipes.
- Use IPA on a paper towel to remove any remaining film or sticky residue.
- Be gentle: Never use abrasive scrubbing on shiny mold interiors—you’ll ruin the glossy finish your castings depend on!
Cleaning Your Work Surface (Uncured Resin)
If you’re using a silicone mat (highly recommended!), wipe spills immediately with paper towels, followed by IPA if needed. Here’s a fun bonus: you can often let small drips cure on silicone and peel them off later!
For plastic sheeting or other protected surfaces, immediate wiping with paper towels and IPA is your best bet. Don’t let resin sit – it starts curing faster than you think!
Tackling Cured Resin: The ‘Oops, I Waited!’ Strategies
We’ve all been there – you got distracted, and now you’re facing cured resin removal. While these methods can help, remember that prevention (cleaning while wet) is always your best strategy!
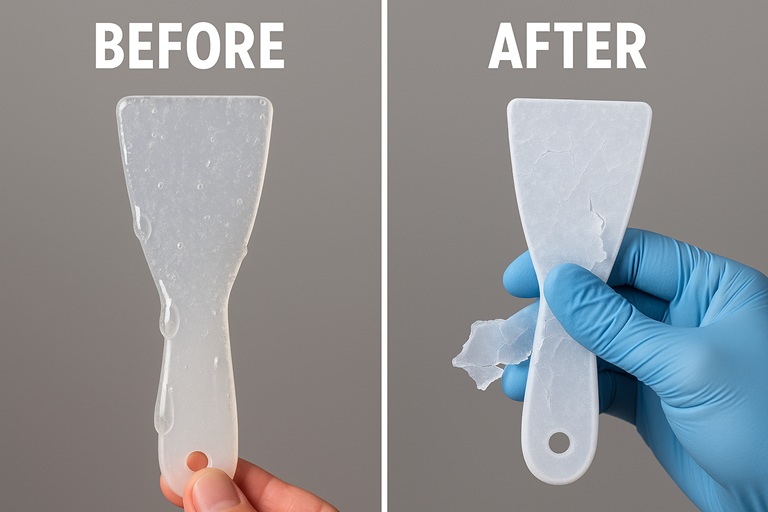
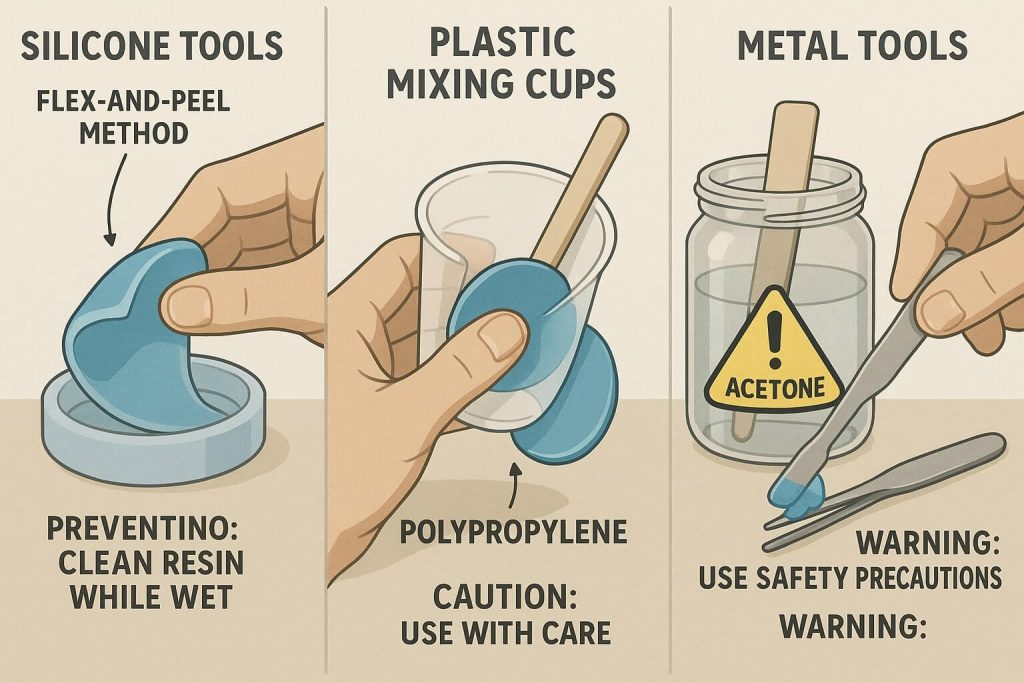
For Silicone Tools (Molds, Cups, Stirrers): Your Best Friend for Cured Resin
The Peel Method: This is why silicone is fantastic! Flex the tool, and watch as the cured resin pops right off. It’s oddly satisfying and saves so much frustration!
Thin Films or Stubborn Spots: Here’s a clever trick: Use the sticky side of strong packing tape to dab and lift small cured resin bits or thin films. It works like magic!
For Plastic Mixing Cups (e.g., Polypropylene #5 – the cloudy, flexible kind)
The Flex & Peel: Similar to silicone, you can often flex these plastic mixing cups to crack the resin bond. The cured disc usually pops out in one satisfying piece!
Pro tip: Leave your stir stick in the leftover resin as it cures—it creates a convenient handle for pulling out the cured disc later.
Soaking (Use extreme caution and test First!): A brief soak in acetone resin cleaning solution might work for stubborn thin layers. WARNING: Acetone can melt many plastics! Always test on a hidden area first. If the plastic becomes soft or cloudy, stop immediately. Always ensure excellent ventilation and wear gloves!
For Metal Tools (e.g., Tweezers, some Spatulas)
Careful Scraping: Use plastic scrapers or a dull craft knife blade to chip away cured resin gently. Take your time to avoid scratching the metal or cutting yourself.
Soaking: Metal tool cleaning is easier because metal can handle stronger solvents. Soak in acetone or lacquer thinner to soften cured resin. Use only glass or metal containers for this!
Gentle Heat (Advanced Users & With Extreme Caution): A heat gun on its lowest setting, kept constantly at a safe distance, can sometimes soften cured resin. RISKS: Overheating releases toxic fumes and can damage tools. It is not recommended for beginners!
The Freezer Trick (For Some Items)
Here’s a neat science trick: placing tools with cured resin in the freezer for about an hour makes the resin brittle. It often cracks off much more easily! Test this method first on a small area to ensure it won’t damage your tool.
Important Note on Cured Resin Removal
Removing fully cured resin can be challenging and sometimes impossible without damaging tools, especially plastics. The moral of the story? Clean your tools while the resin is still wet!
Special Cleaning Considerations for Your Gear
Different tools need different TLC. Here’s how to handle the exceptional cases:
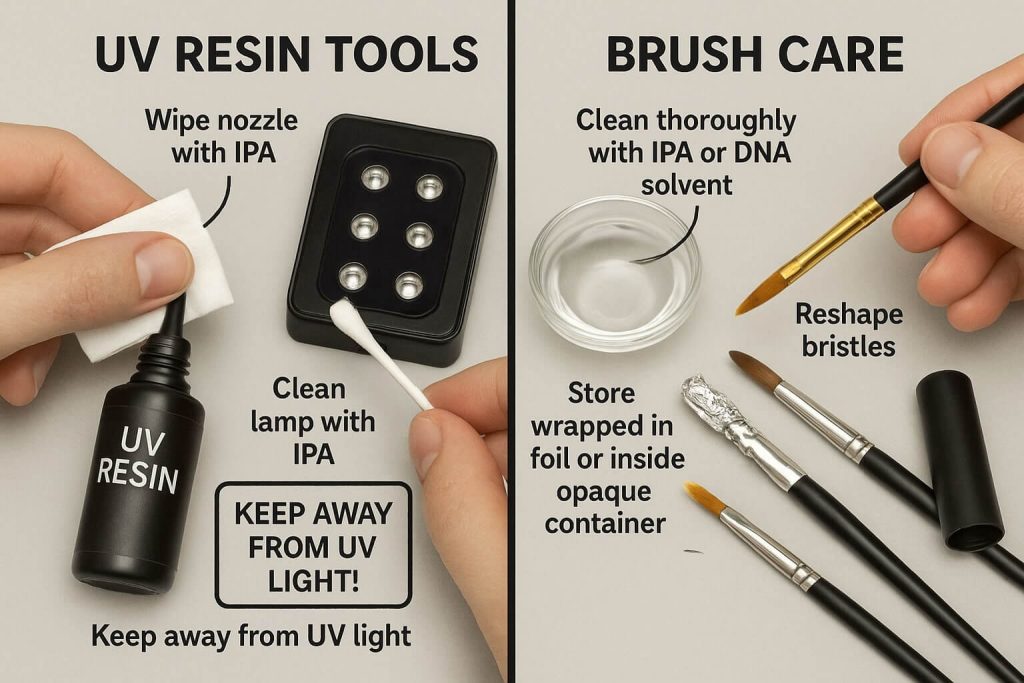
UV Resin Tools: Quick Cures, Quick Cleans
UV Resin Bottle Nozzles: These tiny openings clog faster than you can say “cure time”! After each use, thoroughly wipe the nozzle with an IPA-dampened paper towel. Replace that cap tightly – UV resin is sensitive to any light!
UV Lamp Care:
- Prevention is Key: Cover your work area around the lamp to prevent drips.
- Cleaning Drips (Lamp OFF & COOL!): If resin gets on your lamp, unplug it and let it cool completely. Carefully wipe the exterior with a soft cloth slightly dampened with IPA.
- Avoid Liquids Inside: Never let any liquid seep into the lamp housing or touch the bulbs/LEDs
- Bulbs/LEDs: Check your manufacturer’s instructions to see if resin cures on a bulb. Carefully cleaning with IPA on a cotton swab sometimes works, but proceed cautiously.
Resin Colorant Bottles & Tubes
Here’s a simple tip that prevents massive headaches: always wipe the threads of bottles and caps with a paper towel (add a tiny bit of IPA for sticky pigments) before closing. This prevents them from becoming permanently glued shut!
Keeping Your Brushes Bristle-Perfect
Brushes require special attention to stay soft and usable:
For Epoxy Resin Brushes:
- Act Fast: Epoxy waits for no one! Clean immediately after use
- Wipe Excess: Remove as much resin as possible with paper towels.
- Solvent Clean: Swirl bristles in IPA or DNA, working the solvent through. Repeat with fresh solvent until clean.
- Soap & Water Wash: Follow with warm water and dish soap. Reshape bristles and air dry.
- Pro Method: Some artists keep brushes in a sealed container with DNA between uses, then do a thorough soap wash later
- Consider Disposable: For small jobs, cheap “acid brushes” save cleaning time – just let them cure and toss!
For UV Resin Brushes:
- Wipe Thoroughly: Remove all visible resin with paper towels and IPA.
- Protect from Light: This is crucial! Store immediately in darkness – wrap in foil or place in an opaque container. No UV light = no curing!
- Dedicated UV Brushes: Many artists keep UV-only brushes that they wipe and then store in darkness between uses
Resin Cleaning Safety & Responsible Disposal: Your Non-Negotiables!
This is the most crucial section of our guide. Your health and our environment depend on following these guidelines!
Always Wear Your Protective Gear (PPE)!
Nitrile Gloves are non-negotiable! They protect your skin from resin and solvents. Change them if they are torn or after extended solvent exposure.
Safety Glasses: Protect those peepers from splashes! Resin or solvents in your eyes is a medical emergency.
Respirator (with organic vapor cartridges): This is strongly recommended when using acetone or working with limited ventilation for resin. It isn’t a dust mask, but it filters out harmful chemical vapors!
Good Ventilation is Your Friend
Always work in a well-ventilated space. Open windows, use fans and work outdoors if possible. Your lungs are precious—treat them well!
Handling Solvents (IPA & Acetone) Safely
- Flammable: Keep far away from flames, sparks, or heat sources
- Skin Irritants: These chemicals aggressively dry out the skin. Always wear gloves!
- Inhalation: Use only in well-ventilated areas. Those fumes aren’t just unpleasant – they’re harmful.
If Resin Touches Your Skin
- Immediately wipe off with a paper towel.
- Wash thoroughly with soap and water. A gentle scrub with sugar or salt mixed with soap helps lift residue.
- NEVER use IPA or acetone on your skin! While they dissolve the resin, they also help harmful chemicals penetrate your skin and cause severe irritation.
Responsible Resin Waste Disposal: Let’s Protect Our Planet!
The Cardinal Sin is to NEVER Pour Liquid Resin or Solvents Down the Drain or Toilet! This causes severe plumbing damage and environmental harm.
Cleaning Uncured/Liquid Resin Waste (Epoxy or UV):
- Small Amounts: Allow paper towels and stir sticks with resin to fully cure—use sunlight for UV resin and time for epoxy—before disposing of them in the regular trash.
- Larger Amounts of Mixed Epoxy: Pour into a disposable lined container, let cure solid, then trash
- Larger Amounts of UV Resin: Pour thin layers and cure under a UV lamp in batches until solid, then trash
Cleaning Resin-Contaminated Solvents (IPA/Acetone):
- Small amounts of IPA: Let evaporate safely in well-ventilated outdoor areas (check local laws). Cure any remaining resin residue before disposal.
- Larger amounts of acetone: Treat as hazardous waste. Contact your local waste management for proper disposal options.
Empty Resin Bottles/Containers:
- Scrape out residue and try to cure any remainder
- Once fully cured, check local regulations for disposal
- Many areas allow these in regular trash once the resin is fully cured
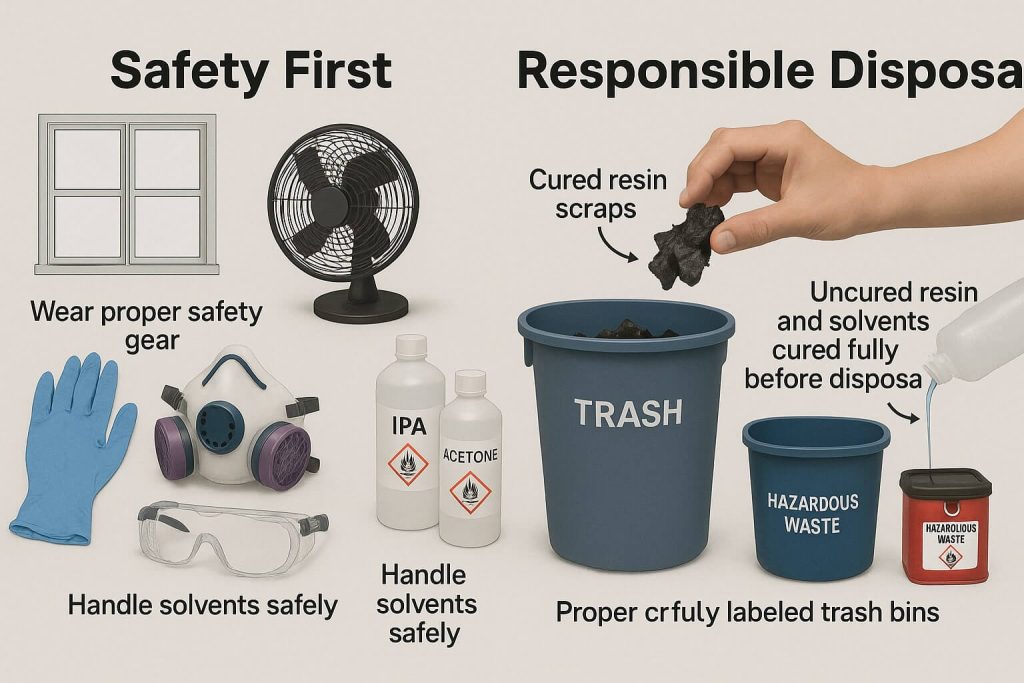
Cured Resin Pieces: Fully cured resin is generally considered inert plastic and can go in household trash, but always check local regulations for large items.
Pro Tips for Easier Resin Tool Maintenance & a Cleaner Craft Space
Let me share some wisdom to make your resin journey much smoother: tackle messes early, stay organized, and never underestimate the power of proper prep!
“Clean As You Go” is Your Crafting Mantra: This single habit will save you more time and frustration than any other tip!
Silicone is Your Resin Crafting Best Friend: Invest in all things silicone—cups, molds, mats—because, once the resin cures, it peels off easily!
Protect Your Workspace Diligently: Always use protection. Silicone mats, plastic sheeting, even parchment paper – anything is better than resin on your table!
Protect Your Surroundings: Resin is unforgiving on fabrics and porous surfaces. Cover everything thoroughly – clothes, floors, furniture. Once cured, it’s there forever!
Have Your Cleaning Kit Ready BEFORE You Start: No more panic-searching for paper towels with sticky gloves!
Use Smaller Mixing Cups for Smaller Batches: There is less waste and less to clean resin cups afterward.
Dedicate Your Tools: Keep resin tools separate from kitchen items. Your family will thank you!
Baby Wipes for Quick Cleanups: Keep them handy for immediate small spills on gloved hands or tools. For skin contact, always follow with proper soap and water.
Don’t Forget the Nooks and Crannies: Cotton swabs dipped in IPA are perfect for threads on caps and tight corners.
Line Your Trash Bin: A plastic liner contains all those sticky wipes and prevents bin disasters.
Consider a “Slop Bucket/Mold”: Designate one old silicone mold for leftover resin. The mold will cure into blocks you can use for practice or abstract art!
Wrapping Up: You’ve Got This!
Let’s recap the essentials: Clean wet resin immediately with IPA, embrace silicone tools for easy cured resin removal, and always prioritize safety and responsible disposal. These three principles will serve you well throughout your resin journey.
See? Learning how to clean resin tools isn’t the nightmare you might have imagined! With these strategies in your toolkit, maintaining your resin supplies becomes just another part of the creative process – not a dreaded chore.
Now that you’re armed with the best cleanup strategies, you can focus on the fun part – creating beautiful things with resin! Go forth and craft confidently, knowing you can handle the sticky bits. Your tools will stay pristine, your workspace will stay inviting, and your creativity can flow freely. Happy crafting, resin artist – you’ve got this!
")
")