

What Materials Do I Need for Resin Art? An Essential Shopping List for Beginners
Resin art opens a world of creative possibilities with its glossy, glass-like finishes and incredible versatility. From shimmering coasters to intricate jewelry pieces, resin transforms ordinary materials into extraordinary works of art. But here’s the truth: having the right materials is the crucial first step for a successful and enjoyable experience.
This comprehensive guide covers everything you need to start your resin art journey: essential resin and tools, safety gear, workspace items, optional colorants, cleaning supplies, beginner kits, where to buy, and initial costs. If you’re feeling overwhelmed by the prospect of shopping for resin art supplies, don’t worry. This guide will demystify the entire process and give you confidence to make wise purchasing decisions.
Core Resin Art Materials: The Absolute Essentials
1. Epoxy Resin and Hardener: The Heart of Your Craft
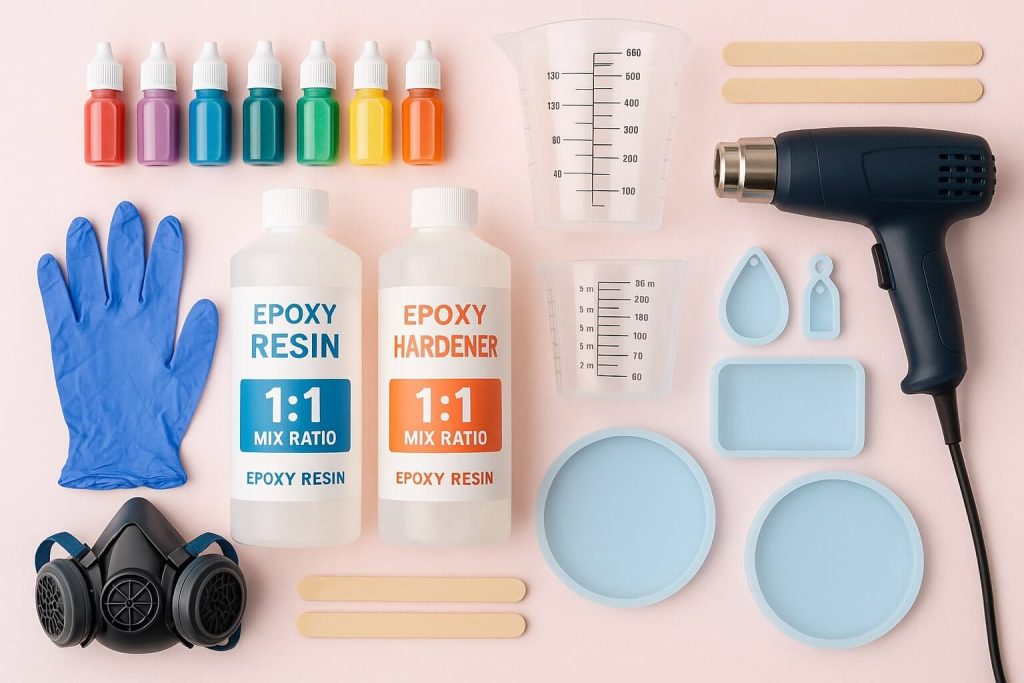
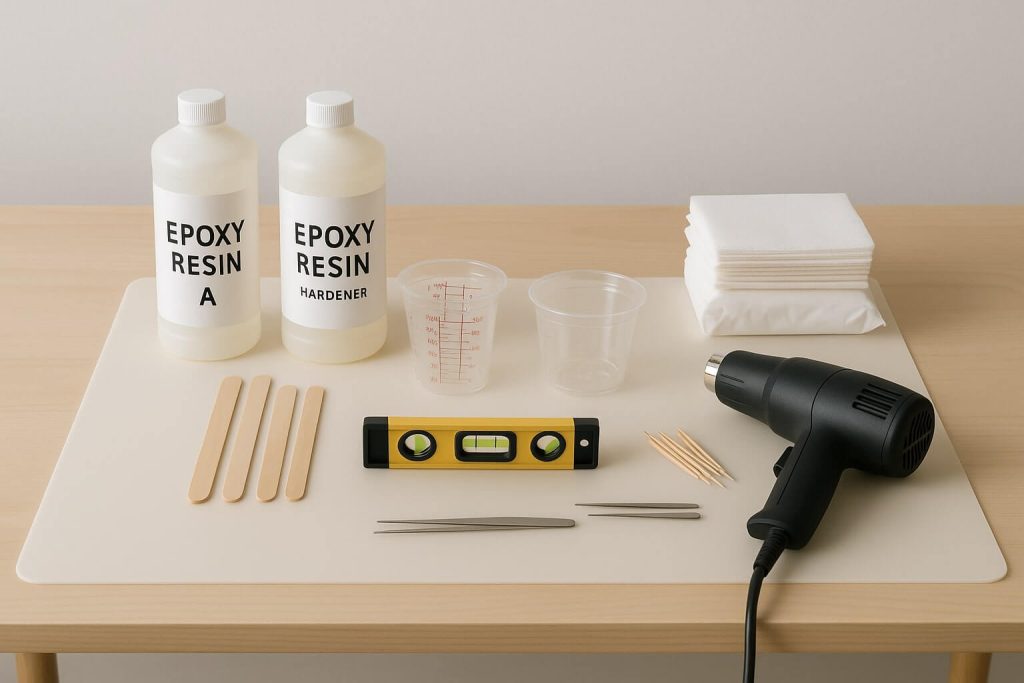
Epoxy resin is a two-part system consisting of Part A (Resin) and Part B (hardener). When these components are mixed, they create a chemical reaction that transforms the liquid into a solid, durable material.
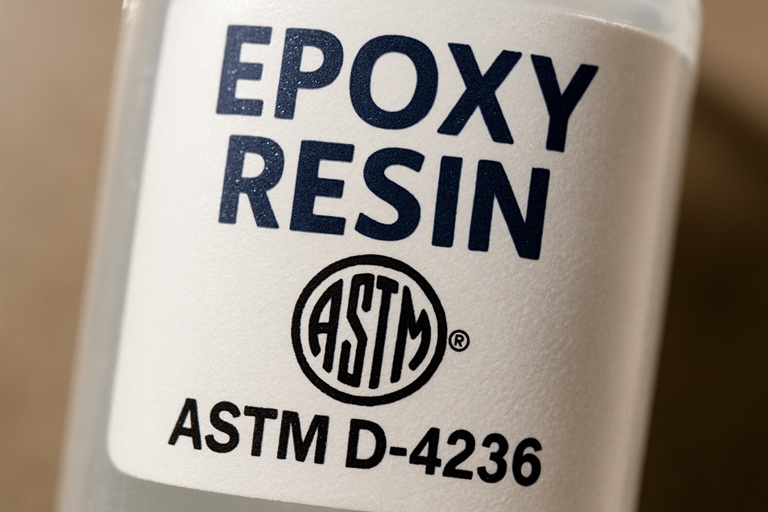
Recommendation for Beginners: Choose an ‘Art Resin’ or general-purpose epoxy resin specifically labeled for crafts/art with a 1:1 mix ratio by volume. This ratio simplifies measuring and dramatically reduces errors. Look for products with ASTM D-4236 certification, which indicates non-toxicity when used as directed.
Start with a smaller quantity, like a 16-oz or 32-oz total kit for your initial projects. This will give you enough material to practice without a huge investment.
There are two main types of resin: coating resin (thicker for surfaces) and casting resin (thinner for molds). A versatile 1:1 “Art Resin” works well for beginner projects like coasters or small molds, making it the perfect starting point.
Remember that epoxy resin has a shelf life. Once opened, it’s best used within a year for optimal results.

2. Measuring & Mixing Supplies: Precision is Paramount
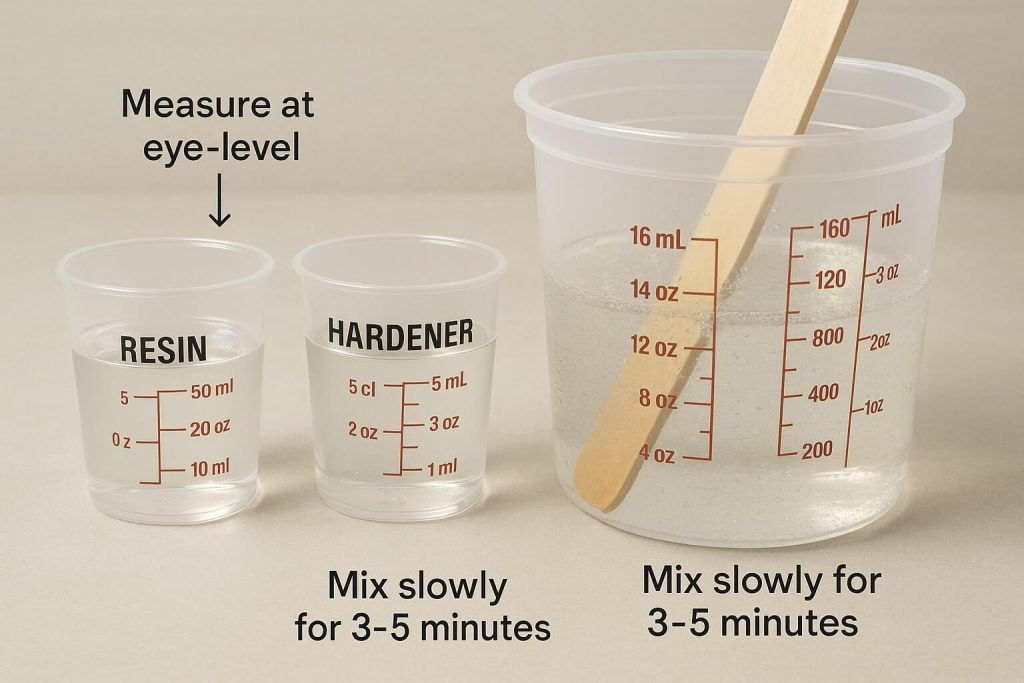
Graduated Measuring Cups: You will need clear plastic or silicone cups with precise, easy-to-read volume markings (ml or oz). You must measure Part A and Part B separately for accuracy. When measuring, it is not the right time to do eyeball measurements!
Mixing Cups: Get larger, clean cups to combine the measured resin and hardener. Disposable plastic cups (like party cups) work well, or invest in reusable silicone mixing cups since cured resin peels off easily. If using plastic, HDPE or polypropylene is a good choice.
Stir Sticks: Wooden popsicles or craft sticks are inexpensive and effective. Plastic or silicone stirrers offer reusable alternatives. Thorough mixing requires scraping the sides and bottom of your mixing cup repeatedly.
3. Shaping Your Creations: Molds or Surfaces (Brief Overview)
Silicone Molds (for casting): These molds are highly recommended for beginners due to their flexibility, ease of demolding, and reusability. Common beginner mold types include:
- Coasters
- Small trays
- Jewelry components (pendants, earrings)
- Keychains
- Magnets
Surfaces (for coating): Resin can also be poured on flat surfaces like primed wood panels, supported canvas, or ceramic tiles. However, molds are often simpler for a first project.

Safety First: Indispensable Protective Gear
Working safely with liquid epoxy resin and hardener is NON-NEGOTIABLE. These chemicals can irritate the skin, cause sensitization, and release fumes (VOCs) during mixing and curing. While cured, the resin is generally inert; the liquid components require careful handling.
Your Non-Negotiable Safety Equipment Checklist
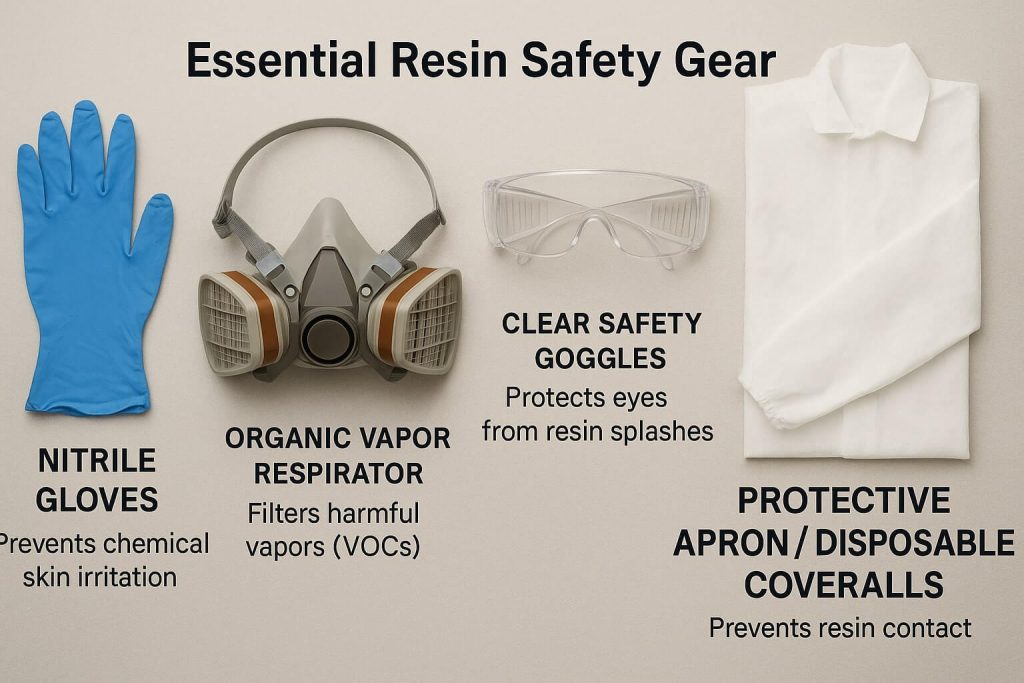
Nitrile Gloves: These are crucial for protection. Nitrile offers better chemical resistance than latex, which can degrade when exposed to resin. Wear gloves whenever handling liquid resin components and during cleanup.
Respirator (with Organic Vapor Cartridges): A half-face or full-face respirator specifically designed for organic vapors is strongly recommended. Standard dust masks are NOT sufficient. This equipment protects your lungs from fumes, especially with less-than-ideal ventilation.
Safety Glasses/Goggles: Essential protection against accidental splashes that could damage your eyes.
Protective Clothing: Wear an apron, an old long-sleeved shirt and pants, or disposable coveralls. Once the resin cures, removing it from the fabric is extremely difficult.
Table 1: Essential Safety Gear Summary
Gear ItemProtects AgainstWhy It’s Essential for Beginners
Nitrile Gloves Skin contact, irritation, sensitization Resin components can cause skin reactions or lead to allergies
Organic Vapor Respirator Inhaling chemical fumes (VOCs) Protect lungs from potentially harmful vapors during mixing/curing
Safety Glasses/Goggles Eye splashes Prevent liquid resin/hardener from damaging eyes
Protective Clothing Spills on clothes resin is tough to remove from fabric once cured.
Workspace Setup: Protective & Utility Items
1. Protecting Your Work Area
Plastic Sheeting / Silicone Mat / Garbage Bags: Cover your work surfaces thoroughly to protect them from drips and spills. Cured resin is tough to remove from most surfaces, but silicone mats make excellent reusable options since cured resin peels off easily.
Paper Towels / Baby Wipes: Keep these within arm’s reach for immediate cleanup of uncured resin spills on tools, gloved hands, or protected surfaces.
2. Essential Tools for a Smooth Process
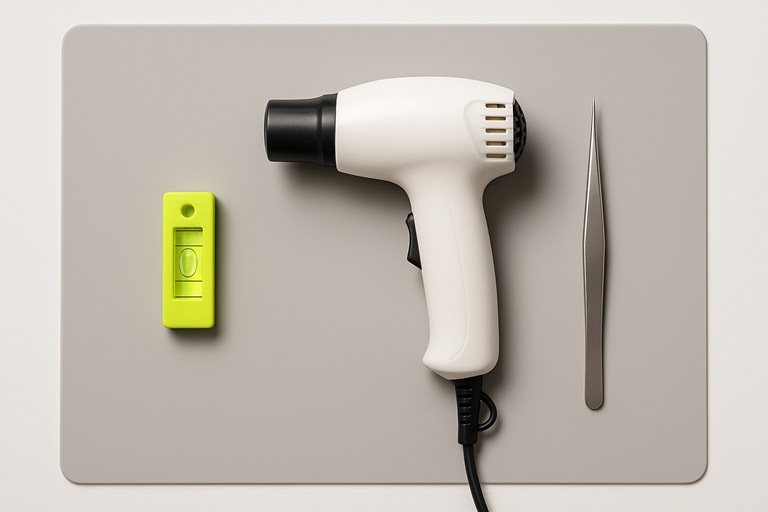
Level (Spirit Level): This tool is crucial for ensuring your work surface and project are perfectly level. Uneven surfaces lead to resin pooling and uneven curing.
Heat Gun or Small Propane/Butane Torch: These tools remove bubbles from poured resin. Use quick, sweeping motions to pop surface bubbles. Caution: Don’t overheat the resin. If using alcohol inks, AVOID THE TORCH (they’re flammable) and use a heat gun instead.
Toothpicks or Tweezers are perfect for picking out dust, hairs, or debris from wet resin. They’re also helpful for manipulating small embedments.
Plastic Stands/Cups (Optional but Recommended): Elevating your projects allows drips to fall freely and prevents your work from sticking to the surface beneath.
Adding Flair: Optional Colorants and Embellishments
The transparent resin creates beautiful results, but adding colorants and embellishments is where the real fun begins. The golden rule is to add no more than 5-6% colorant to the total volume of mixed Resin. This rule ensures proper curing.
1. Popular Colorants for Beginners
Mica Powders: Create shimmery, pearlescent, and metallic effects. They’re easy to mix and produce stunning results.
Alcohol Inks: Produce vibrant, transparent colors and unique “petri dish” effects. Caution: These are flammable, so use a heat gun rather than a torch. They may affect food safety unless top-coated. Use very sparingly.

Acrylic Paints (Artist Grade, High Pigment): Create opaque colors. Use sparingly (just a tiny drop) as too much water-based paint can affect cure and finish quality.
Resin Tints/Opaque Pigments (Liquid/Paste): Specifically formulated for resin, these provide reliable, consistent transparent or opaque colors.
Table 2: Quick Guide to Common Resin Colorants
| Colorant Type | Effect | Pros for Beginners | Cons/Watch Outs |
| Mica Powder | Shimmery, metallic, pearlescent | Easy to mix, beautiful effects | Can settle if not mixed well; use fine powder |
| Alcohol Ink | Vibrant, transparent, “petri dish” | Unique abstract effects, concentrated | FLAMMABLE (no torch!), use sparingly, may affect food safety |
| Acrylic Paint | Opaque/Semi-opaque solid color | Inexpensive, widely available | Use VERY sparingly (water-based, can affect cure/gloss if too much) |
| Resin Tints/Dyes | Consistent transparent or opaque color | Designed for resin, predictable | Can be more expensive; some are very concentrated |
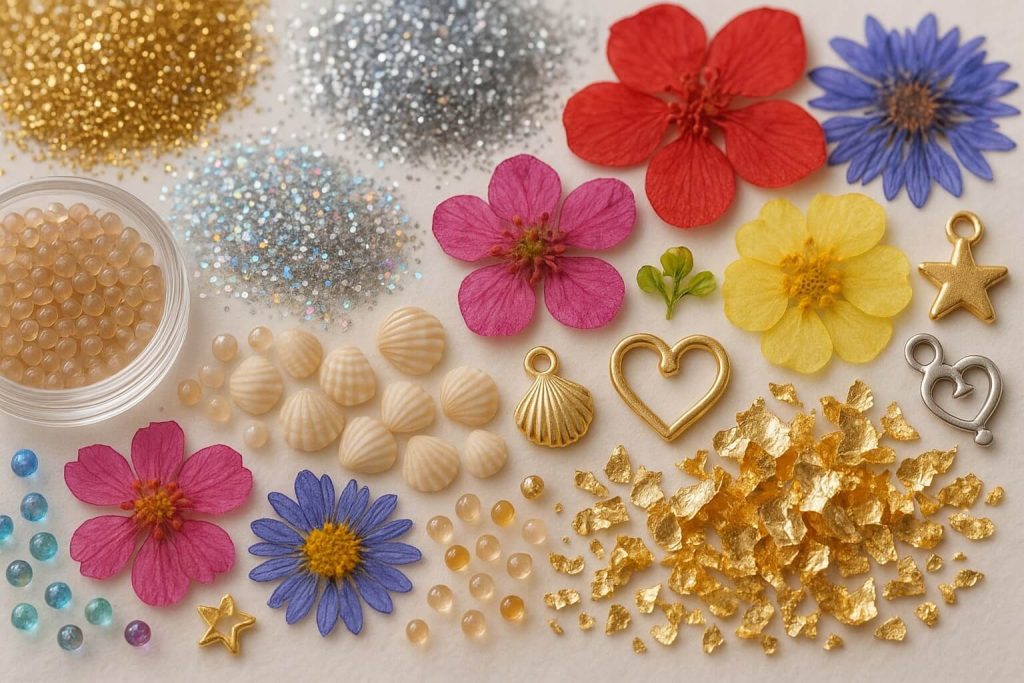
2. Sparkle and Embedments (Optional Fun)
Glitters: These are available in various types, including fine, chunky, and holographic. Remember that heavier glitters might sink during curing.
Embedments: Dried flowers, beads, sealed paper, and small trinkets add personality to your pieces. Crucial: Ensure items are COMPLETELY DRY. Seal porous items to prevent moisture issues that cause cloudiness, bubbles, or poor curing.
Cleaning Supplies: Keeping Things Tidy and Safe
1. Cleaning Uncured Resin from Tools & Surfaces (Non-Silicone)
First, wipe off excess resin with paper towels. Then, use isopropyl alcohol (90%+) or acetone to clean the remaining residue from tools like plastic cups and stirrers. Always wear gloves during this process.
2. Cleaning Silicone Tools & Molds
For uncured resin, wipe off the excess. For cured resin, you can often peel it off flexible silicone once it’s fully hardened.
3. Cleaning Uncured Resin from Skin
Wash immediately and thoroughly with soap and water. An exfoliating soap or specialized resin hand cleaner can help remove stubborn residue.
CRITICAL REMINDER: DO NOT use solvents (alcohol, acetone, vinegar) on the skin, as they can increase the absorption of chemicals through your skin.
4. Disposal of Waste
Check your local regulations for proper disposal methods. Generally, small amounts of leftover mixed resin are allowed to cure fully in their mixing cup and then disposed of as solid waste. Never pour liquid resin (mixed or unmixed components) down the drain.

Making it Easy: Beginner Resin Material Kits
What are Beginner Resin Kits?
Beginner kits bundle several basic supplies into one convenient package, making it easier to get started without hunting for individual items.
What to Look For in a Good Starter Kit
A quality starter kit should include:
- Reasonable quantity of 1:1 ratio Art Resin & Hardener
- Basic safety gear (at least nitrile gloves; respirators often need separate purchase)
- Measuring cups, mixing cups, and stir sticks
- A few simple silicone molds
- Optionally, a small selection of basic colorants/glitters
- Clear, detailed instructions
Pros and Cons of Using Kits
Pros:
- Convenience of one-stop shopping
- It can be cost-effective for sampling the hobby
- Less daunting for a first purchase
Cons:
- Quality can vary between manufacturers
- It may not include all essential safety gear (especially respirators)
- Limited choice of brands and molds
Recommendation on Kits
Carefully review kit contents against the essential and safety checklists in this article. Kits can provide a good start but be prepared to supplement them, especially with safety gear like a respirator.

Where to Buy Your Resin Art Supplies
1. Online Retailers
Large E-commerce Platforms: Amazon offers a wide selection but carefully checks seller ratings and reviews.
Specialized Online Resin Art Supply Stores: Sites like Let’s Resin, ArtResin.com, Resin Obsession, Just Resin, and Counter Culture DIY often offer curated quality products and better customer support.
Craft Marketplaces: Etsy is excellent for finding unique molds and specialty items from individual creators.
2. Local Craft Stores
Chains like Michaels (North America) or similar local hobby shops let you see products in person before purchasing.
3. Tips for Choosing Suppliers
- Read product reviews, especially for resin quality
- Compare the price per ounce/ml for resin to find the best value
- Look for safety certifications (ASTM D-4236)
- Factor in shipping costs and delivery times for online orders

Understanding the Initial Investment: What Will Your Starter Setup Cost?
Is Resin Art Expensive to Start?
The overall cost of resin art is a common concern for beginners. The initial outlay can vary significantly based on your choices and location.
Estimated Starter Budget
As a general guide, expect to invest $75- USD 150 in essential core materials, critical safety gear (including a respirator), and basic workspace protection. This can vary depending on your location and chosen brands.
Main Cost Components for Beginners
Epoxy Resin & Hardener: Often the most significant initial expense, but essential for quality results.
Safety Gear: An essential investment that protects your health. A good respirator alone can cost $30-$50+.
Molds & Basic Tools: Mold prices vary widely. Mixing supplies are generally inexpensive.
Advice on Starting Small
Start with smaller resin kits to confirm your enjoyment of the craft before investing in bulk supplies. Optional items like multiple colorants, molds, and advanced tools can be added gradually as your skills and interests grow.
Conclusion
Gathering the right resin art materials for beginners sets the foundation for a safe and successful creative journey. The key categories are core resin and mixing tools, essential safety gear, workspace protection, and optional creative additions.
With your shopping list and safety knowledge secured, you’re ready to embark on the rewarding adventure of resin art. Each project teaches new techniques, and soon, you’ll create pieces that amaze you and others. The glossy finishes, endless color possibilities, and the satisfaction of creating something beautiful with your hands make resin art a truly special craft.
Remember: start small, prioritize safety, and enjoy the creative process. Your first pour might not be perfect, but it’s the beginning of an exciting artistic journey. Happy creating!

